How to Get Your VHS Videos Onto Your PC
By admin on Jun 3, 2013 in Hardware, Software
 Technology today has made it possible to share so much with family and friends on the other side of the world. YouTube and other social media networks are brilliant because they allow you to share everything quickly and easily, this includes favourite photos, images and videos you may have taken of a special event.
However, you may have lots of memories which are stored on video tapes which these days are usually left on a shelf. This could be a recording of a really special event like a wedding or a memorable 21st birthday party. The question is how to get your VHS videos onto your PC so that you can store these memories safely and share them if and when you want to with close family and friends.
How Old Is Your PC?
If your PC is pretty old it might not be able to handle videos because they take up a massive amount of memory. With this said, if you own a new computer there is normally loads of space on the hard drive which means handling videos is not a problem. If you are unsure, it’s best to seek advice from the experts before you even begin.
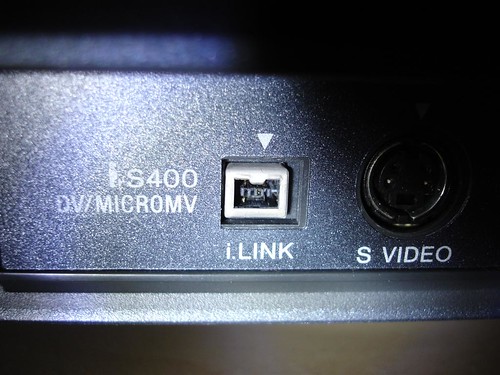
Uploading Videos to Your Computer
The fact you can upload videos onto a computer means you can save and store them on your hard drive or disk. The videos are saved in digital format so you can share them with friends and family over the Internet on any device you like to use, including a smartphone or tablet. You will need to buy a video card for your PC and it must be one that offers you several options of how to upload your videos. The card needs to have connections for Firewire or RCA plug ports which allow you to directly connect to other devices like a camcorder.
Next you’ll need to open the video software application – this will take care of all the uploading and storage of your video content. If you’re running Windows XP, Media Centre or Vista, you can use the Movie Maker program which is built into the operating system. By connecting the media device to the PC’s video interface, your computer will be able to identify and allow your videos to transfer to your hard drive. Lastly, you will need to allocate a file to accept each video you transfer to your computer.
 Saving Uploaded Videos to CDs or DVDs
Once you have transferred all your videos onto your computer, you may want to burn all of them onto a CD or DVD. Not only does this serve as great backup copies of your favourite videos but you would also be able to watch them on a laptop or other device like a TV should you want to. Backing up photos and videos as well as any other content you keep on your hard drive is important because you never know when things might go wrong and you could lose all your data.
Finding Tools That Make Things Easier
There are a lot of really useful tools around these days that help transfer videos to computers. The great thing is most are free downloads and this includes Apples’ iMovie2 movie-making tool. It’s pretty much the same as the Windows’ Movie Maker program, so if you don’t already have this on your computer, it is definitely worth getting.
Conclusion
Transferring all your favourite videos onto your computer is no longer that daunting task you tend to put off. If you love sharing things with family and friends having everything on your hard drive in digital format lets you do this in the click of a button on social media sites or emails. The best part is that as long as you back up your data, you precious videos are stored safely away for posterity. In brief learning how to get your VHS videos onto your PC is definitely worthwhile.
About the author: post written by Bushey DVD, the vhs to dvd converter service provider.
Image sources: http://farm8.staticflickr.com/7068/6939206771_9c21e5c44d.jpg and
http://farm1.staticflickr.com/91/277823391_625d1ff55c.jpg
Image credits: comedy_nose and craig1black

Post a Comment