How to use the Windows XP Recovery Console
By admin on Dec 22, 2008 in PC Crash, Windows XP
 First of all, you’ll need the Windows XP CD. Next, you need to make sure that CD/DVD is the first boot device in BIOS. To load BIOS, press DEL at the startup screen (in some PCs a different button is used, for example one of the Function keys) and look for the boot device priority. If CD/DVD is not at the top of the list, select it and press the plus (+) key until it’s on top. Press F10 to save the settings and exit.
- Restart the PC and put the XP CD in the CD/DVD drive. Follow the instructions on screen (Press any key to boot from CD…)
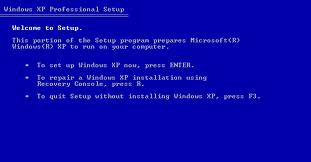
- At the first menu, you’ll be shown a couple of options. Press R to load the Recovery Console.
- In the next window, you’ll be asked to log on to your Windows installation. Most PCs will have only one, so you have to press 1 and Enter.
- You are now in the C:\Windows directory. To see the list of available commands, type in HELP.
In my previous blog entry, I used the CHKDSK command to fix logical file system errors. From this location, you can also use FIXMBR to write a new master boot record to the hard drive or view/access subfolders with the DIR and CD commands.
If you have trouble accessing your data by starting Windows normally, you can COPY files from here to another location, for example a USB drive, external hard drive, or even floppy disk. I’ll post detailed instructions in my next blog entry.
If your Windows installation is damaged and an important system file is missing (usually ntldr), you can replace it with the same file. Simply transfer a copy from the CD to the target folder on the hard drive. There are other functions of the Recovery Console, which I’ll discuss in later blog entries.

1 Trackback(s)
Post a Comment